
Best stackable shoe racks for hallways
Compare two documented stackable shoe rack systems. Check maximum stack, wall fixing, shelf loads and how the footprint changes with shoes.
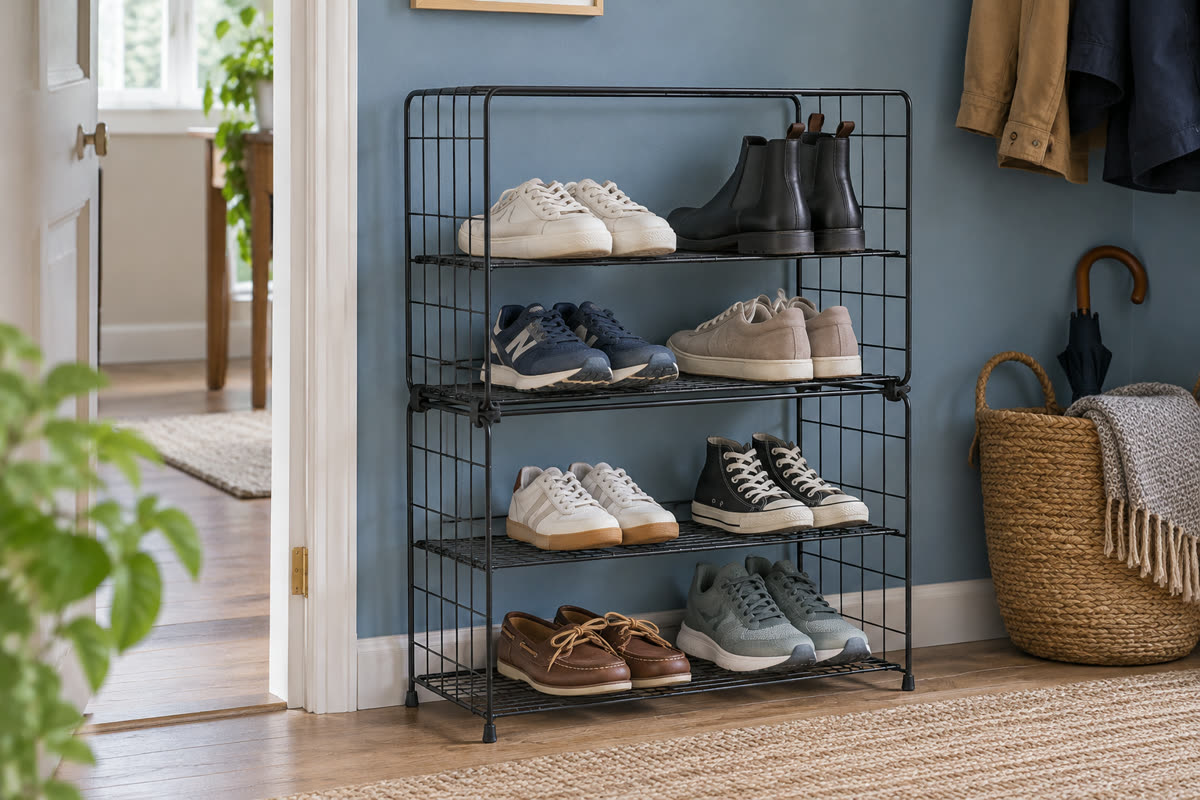
Two racks with documented stacking instructions
The dimensions and shelf loads below are for one rack. Check the instructions before buying multiple units or estimating the final height.
Shallow frame with adjustable width
Yamazaki Frame expandable three-tier rack
Set the frame between 41 and 70 cm wide. The 25 cm frame depth leaves more room to assess how far footwear projects.
- Max width · W × D × H cm
- 70 × 25 × 46
- Access
- Three open tiers
- In the pack
- One rack
What to check Check the shoes on the rails. The maker allows up to two units in its stacking arrangement and lists 3 kg per shelf.
View on Amazon — Yamazaki Frame expandable three-tier rackShort wall span
Joseph Joseph Level adjustable shoe rack
This narrow floor footprint holds shoes vertically on adjustable shelves. It can be configured as part of the same system.
- Outside · W × D × H cm
- 26 × 35 × 51.2
- Access
- Adjustable open shelves
- In the pack
- One rack
What to check Allow 35 cm frame depth before shoe projection. The maker lists 1 kg per shelf and requires every rack in a stack to be fixed to the wall.
View on Amazon — Joseph Joseph Level adjustable shoe rackSide-by-side dimensions
Scroll sideways to see all columns.
| Rack | W × D × H per rack | Load per shelf | Stacking check |
|---|---|---|---|
| Yamazaki Frame 7556 | 41–70 × 25 × 46 cm | 3 kg | Maximum two units in the maker's stacking arrangement |
| Joseph Joseph Level 55008 | 26 × 35 × 51.2 cm | 1 kg | Every rack in a stack must be screwed to the wall |
Check the exact system before adding a tier
Start with the model number on the label or assembly instructions. A manufacturer can use a family name for several racks that differ in height, leg shape or connecting hardware. Read the section on stacking and look for the parts used to join the units, the stated limit and any wall attachment. Confirm that you can get the required parts before ordering a second unit. Use only the configurations and hardware covered by the instructions.
If you already own a rack that is advertised as stackable, check the assembly instructions for that exact model. Ask the maker which units are compatible and what securing method is specified if the directions are unclear. A replacement model with the same colour or width can still have different feet or connections. Check whether you need to remove any single-unit parts and how the two units are meant to meet.
Check the installation location before opening the boxes. If the instructions require wall anchoring, identify the wall material and the right fixing approach. If you cannot meet the installation requirements, the guide to storage without wall fixings covers lower formats that can keep daily footwear in reach.
Measure the full stack, loaded
Measure the floor at the exact position and note where the rear supports meet the skirting. Record the available width and height at several points, particularly in an alcove where trim, a switch or a coat hook can take up space. Get the assembled dimensions for the stack rather than using the single-unit height to estimate it. Include the shoes on the highest tier and space to remove them without catching a coat or shelf.
Check the loaded front edge at every height. People may walk close to the base of a rack and brush against higher toes or heels. Place the longest pair where it will live, then measure its projection into the hall. Tape the combined outline and try walking past while carrying a bag. If the second rack makes it hard to walk past comfortably, try a shorter single unit or place the stack farther from the doorway.
The difference between width and depth matters in a narrow hallway. The Level uses a 26 cm wall span but takes 35 cm of frame depth. The Frame starts at 41 cm wide and is 25 cm deep before any shoe projection. Mark both on the floor if you are working around a return or a shallow recess. Test where you can stand to reach the top as well as the bottom.
Plan shelf loads and access
Weigh pairs that are noticeably heavy if the shelf rating is close. Place both shoes on the scale together with any other items that would share the shelf. Use the shelf rating for each level and follow any load limits for the whole unit or stack. Keep heavy pairs where the instructions permit, with a stable base and the prescribed connections in place. If a pair needs to exceed a shelf limit, give it a separate floor-level home.
Decide how much space each pair takes during removal. A tall pair may be able to sit on the shelf but still snag when lifted over the front support. On an adjustable model, leave a taller opening for the shoes that need it and keep low shoes in tighter spaces. Where the rails are open, check that children's shoes and softer soles are supported. Make each person's most frequently used pair easy to reach.
Choose a rack and test the layout
For a shallow wall with spare width, the Yamazaki Frame adjusts from 41 to 70 cm wide. Compare the set width with your planned pairs, and follow the maker's assembly settings for the two units when stacking. The shallow structure can help beside a wall, provided shoes stay supported and the loaded depth suits the route. Start with one rack if you are unsure how many pairs need to be accessible every day.
For short wall width and adjustable shelf spacing, the Joseph Joseph Level works vertically. Set the shelves for the shoes you use, check the 1 kg shelf limit and follow the required wall attachment for each rack in the stack. Check the position of the upper shelf against any coat rail or cupboard handle. Use another spot for heavy work boots if they exceed the rated shelf load.
Test the plan with the entire household's daily pairs. Count how many need the extra tier and who can reach it. If you only need an occasional pair from the top, move it to a cupboard before adding furniture. Compare single narrow-hallway racks for a wider one-unit layout, or use the hallway hub to check whether another storage format will fit the same space.
Questions before you choose
Can I stack any two racks with the same dimensions?
Use a combination the maker specifies. Matching dimensions alone cannot establish that feet, connectors and supports fit together.
How many Yamazaki Frame racks can I stack?
Yamazaki documents a maximum of two 7556 units in its stacking arrangement. Follow the assembly instructions and confirm the final dimensions.
Does a Joseph Joseph Level stack need wall fixing?
Yes. The maker requires every rack in a stack to be screwed to the wall.
Can I double the product height to get stack height?
Use the assembled height given for the stack, or ask the maker. The units can overlap at a join or use connectors that change the height.
Does shelf load add up to the rack's total limit?
Follow both the individual shelf limits and any whole-unit or stack limits the manufacturer lists. A shelf rating alone does not establish the total permitted load.
What can I use if I cannot meet the stacking instructions?
Try a single rack in a suitable configuration or spread daily pairs across two low floor-level zones. Check their intended placement before buying.
How this shortlist was assembled
We included two exact UK listings with manufacturer documentation for stacking. We used the published single-unit dimensions and shelf ratings. A stack height or additional compatible variant is omitted where the documentation does not establish it.