
How to organise a drawer that only opens partway
Compare exposed and covered drawer space, tray positions and removal routes, with worked layouts for drawers that only open partway.
The main decision
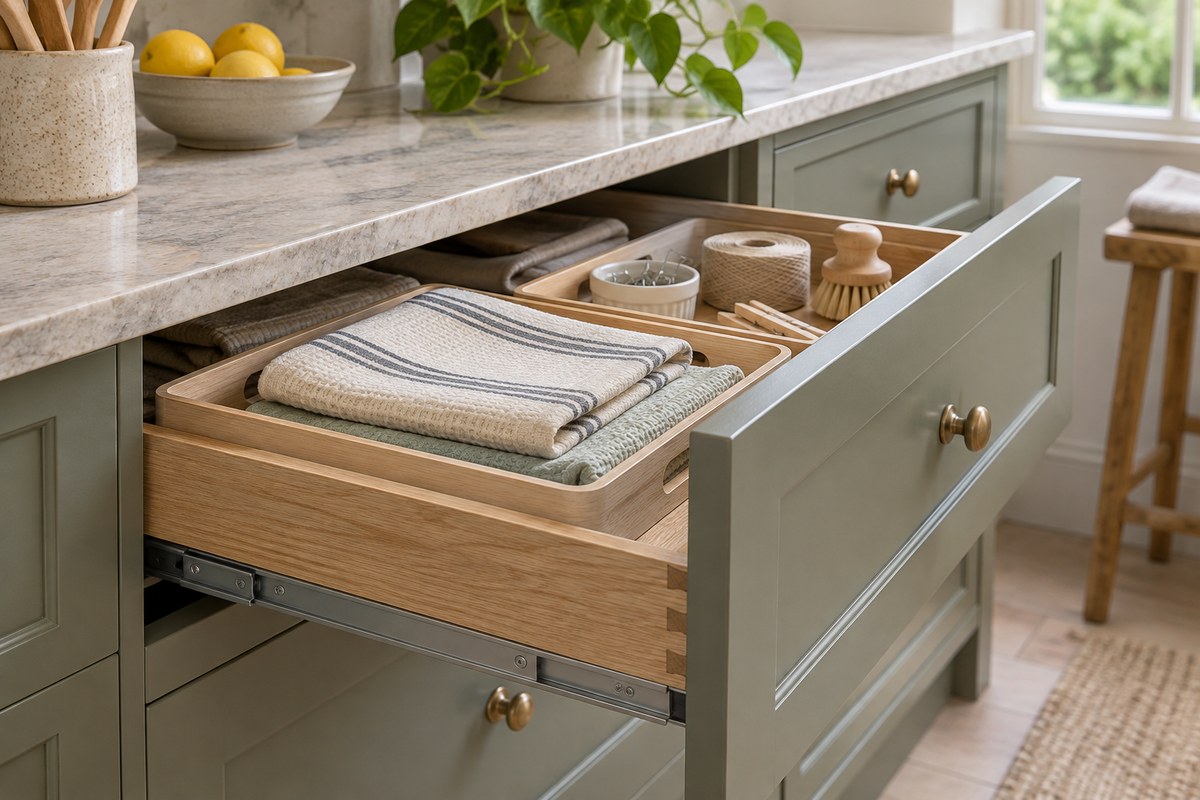
Plan around the part you can see and lift from
Keep daily items in the exposed opening. Use smaller rear groups only if they can move forward and lift out comfortably, and keep the drawer’s intended stops and securing fittings in place.
Find the part of the base you can actually reach
Open the drawer to its normal stop, following the furniture maker’s instructions. Measure from the inside front to the point where the cabinet or worktop begins to cover the drawer. Then measure the internal depth to the back. Record those two measurements separately. The first describes the exposed area, and the second describes the total storage footprint. Keep the runners and stops in their intended position.
Look at the space above the covered rear section. A rail or bracket can reduce the gap just where you would lift a tray. Check the height at the front edge of that obstruction and whether a hand can reach behind it. A low container may slide into the covered section and still be hard to grip. Try a light empty container or cardboard model before deciding which groups belong there.
Check where you stand. A drawer beside a wall may be easy to use from one side and awkward from the other. Place nearby doors and furniture in their normal positions, then try reaching a small item in the back corner. The drawer measuring guide explains how to record the base, closing clearance and usable travel.
IKEA’s STORKLINTA 306.275.33 is one example of this difference. The maker lists a 61 × 40 cm interior and 27.5 cm pull-out travel. Measure the actual exposed opening and the rear obstruction on the assembled chest before choosing a tray. Keep its stops, opening mechanism and required wall restraint in place.
A small group of Joseph Joseph Blox trays can be arranged to move into the exposed area. The published joined footprint is one example layout. Check the pieces you will actually use and whether the assembled group can be gripped and removed level.
For loose everyday essentials
Joseph Joseph Blox 7-piece organiser
Seven trays clip together in different arrangements, so you can group small accessories without committing to one large fixed insert.
- Example layout · cm
- 43.9 × 26.5 × 5
- Access
- Lift-out trays
- In the pack
- Seven trays
What to check The maker’s example arrangement is 43.9 × 26.5 × 5 cm. Check your chosen layout and the clearance under the drawer’s front rail.
View on Amazon — Joseph Joseph Blox 7-piece organiserPut daily items in the exposed part
Choose the items you use each day and lay them in the front section first. Keep the grip or picking point visible. A long utensil can extend into the covered section if its handle is accessible and the head clears the opening when lifted. Try that movement with the widest item and check that you can put it back without pushing other pieces aside.
For folded clothes, keep a short row where you can see each fold. A deep stack at the front can block access to a shallower group behind. Divide the group if you have to lift the whole stack to find one piece. Use the clothes organiser guide to compare compartments against the fold and the closing height.
Separate total depth, exposed depth and a tray’s position
We calculated an illustrative drawer with 46 cm of internal depth and 31 cm of measured exposed base at its normal stop. The rear 15 cm is covered. Tray positions below are measured back from the inside front: a tray at position 0 begins at the front, while the rear tray begins 32 cm back. These figures are not the STORKLINTA chest’s dimensions.
Swipe to compare visible and covered lengths.
| Tray position | Start / depth | Visible length | Covered length | Minimum forward shift for full exposure |
|---|---|---|---|---|
| Short front tray | 0 / 29 | 29 | 0 | 0 |
| Long front tray | 0 / 40 | 31 | 9 | No fully exposed position within this base |
| Rear tray before movement | 32 / 14 | 0 | 14 | 15 |
| Rear tray brought to the front | 0 / 14 | 14 | 0 | 0 |
Plan view · two groups in place
The front group blocks the rear tray’s route
The 29 cm front group, a 3 cm gap and a 14 cm rear tray use all 46 cm of depth. The rear tray is wholly beneath the covering panel. Remove the front group to a suitable clear surface before considering a forward slide.
Do not assume a tray can pass through another tray, a drawer side or the inside front.
Plan view · front group removed
Bring the short rear tray into the opening
This separate position moves the 14 cm tray 32 cm forward, from position 32 to position 0. It now occupies the first 14 cm of the 31 cm exposed area, leaving 17 cm behind it.
The table’s minimum 15 cm movement only brings its back exactly to the covering edge. Neither position establishes vertical grip or clearance over the drawer front.
Turn the published Blox arrangement before changing the drawer
The maker’s joined Blox example measures 43.9 × 26.5 × 5 cm. In a separate width check, the illustrative drawer has 50 cm of clear width. Both upright plan orientations sit within that width and the 46 cm base depth, but their exposure differs:
| Orientation | Across drawer | Width difference | Covered depth | Exposed-area depth left |
|---|---|---|---|---|
| 43.9 cm front to back | 26.5 | 23.5 | 12.9 | No wholly exposed position |
| 26.5 cm front to back | 43.9 | 6.1 | 0 | 4.5 |
Putting 26.5 cm front to back leaves a 4.5 cm depth difference within the exposed area and needs 43.9 cm across the drawer. That trade-off can be more useful than a longer tray, provided the actual joined arrangement, loaded height and grip work. Do not assign the full-set dimensions to an individual Blox tray or infer that a clipped group can be lifted safely while loaded.
The IKEA example’s published 27.5 cm pull-out travel is a movement specification, not a measured 27.5 cm exposed base. Measure the assembled furniture at its normal opening and keep its stops, interlock and required restraint in place.
Group rear items so they can move forward
Use the back for occasional items in a group you can retrieve. A small tray can make that easier if it can slide forward to the exposed area without catching. Measure the whole tray, including feet and handles, and the space it needs to move. Keep the front group shallow enough or removable so you can bring the rear tray into view. Try it with the drawer’s normal load before settling on the layout.
Check the angle if a container must tilt to leave the drawer. Its back corner rises as the front is lifted. A box that clears the closing height when flat can strike the cabinet during that rotation. Use a low case or a smaller footprint if the angle is tight. Put fragile pieces in a position where the container can stay level while you lift it. The layout guide shows how to make templates with hand gaps.
Test removal, return and closure with the usual contents
Place a representative group at the back and the daily items at the front. Take a rear item out, put it back and close the drawer gently. Check whether a handle rides up, a container shifts or a soft item bulges towards the rail. Adjust the layout until each group returns to its intended place without pressing the contents down. A low liner can change both height and sliding resistance, so include it in the test.
If reaching the back is still awkward, use that part for a smaller occasional group or move the items elsewhere. Review the layout when the contents change. A taller replacement bottle or a new folded garment can need more space to pass the covered edge. If the drawer movement itself has changed, check the maker’s maintenance guidance before planning new storage around the reduced travel.
Questions before you choose
Why does my drawer not expose its whole depth?
Some runners are designed for partial extension. Check the furniture instructions before assuming there is a fault or changing the stops.
Is drawer depth the same as pull-out travel?
No. The inside depth describes the base; pull-out travel describes its movement. Measure the opening you can actually use on the assembled furniture.
What should go at the back?
Use occasional items in a group you can bring forward independently. Check their loaded height and the path past the panel above.
Can I use a full-length tray?
A tray deeper than the exposed area cannot become wholly exposed by sliding within the base. A different lift or tilt route needs its own measurements. A shorter tray can remove that dependency without changing drawer stops.
Should I remove a stop to gain access?
Keep stops, interlocks and restraints as the maker directs. Use the normal opening or obtain the maker’s advice about a fault or compatible runner change.
How we put this guide together
We reviewed runner extension guidance and IKEA’s STORKLINTA internal dimensions and pull-out travel. The worked example illustrates access to a tray; measure your assembled drawer and follow its fitting instructions.
Our comparison uses the inputs below and the stated formulas. Room dimensions and handling allowances are illustrative; named product dimensions are kept separate from them. Analysis prepared November 2026.
- Covered base depth = internal base depth − measured exposed base depth.
- Visible tray length = max(0, min(tray front position + tray depth, exposed depth) − tray front position).
- Covered tray length = tray depth − visible tray length.
- Minimum forward shift to full exposure = max(0, tray front position + tray depth − exposed depth), only where tray depth is no greater than exposed depth.
Calculations use unrounded inputs. Displayed results are rounded to two decimal places where necessary.
- The 46 cm base depth, 31 cm exposed depth and 50 cm clear width are illustrative; they are not the IKEA chest dimensions.
- Positions are measured back from the drawer’s inside front. Every tray starts within the base. Movement is along its own unobstructed lane with the drawer at its normal stop.
- A tray deeper than the exposed area cannot become wholly exposed by sliding within that base. No passing through the front wall, tilting route or lifting permission is inferred.
- The 29 cm front and 14 cm rear trays, separated by 3 cm, are hypothetical. The rear lane becomes free only after the front group is removed.
- The rear tray’s minimum 15 cm shift ends with its back exactly at the covering edge. Moving it 32 cm to the front is a separate illustrated position; grip and vertical removal still require a measured path.
- Blox figures refer to the maker’s joined example footprint, not each individual tray. Loaded height and the assembled group’s removal strength remain separate.
- Published runner travel does not establish measured exposed depth. Keep drawer stops, interlocks, runners and required restraints as instructed.
Sources: Joseph Joseph Blox 85199 dimensions; IKEA STORKLINTA 306.275.33 internal dimensions and pull-out travel.