
Best slim shoe cabinets for narrow hallways
Compare four slim shoe cabinets by width, closed depth, flap clearance and wall fixing. Measure large shoes and narrow UK hallways before buying.
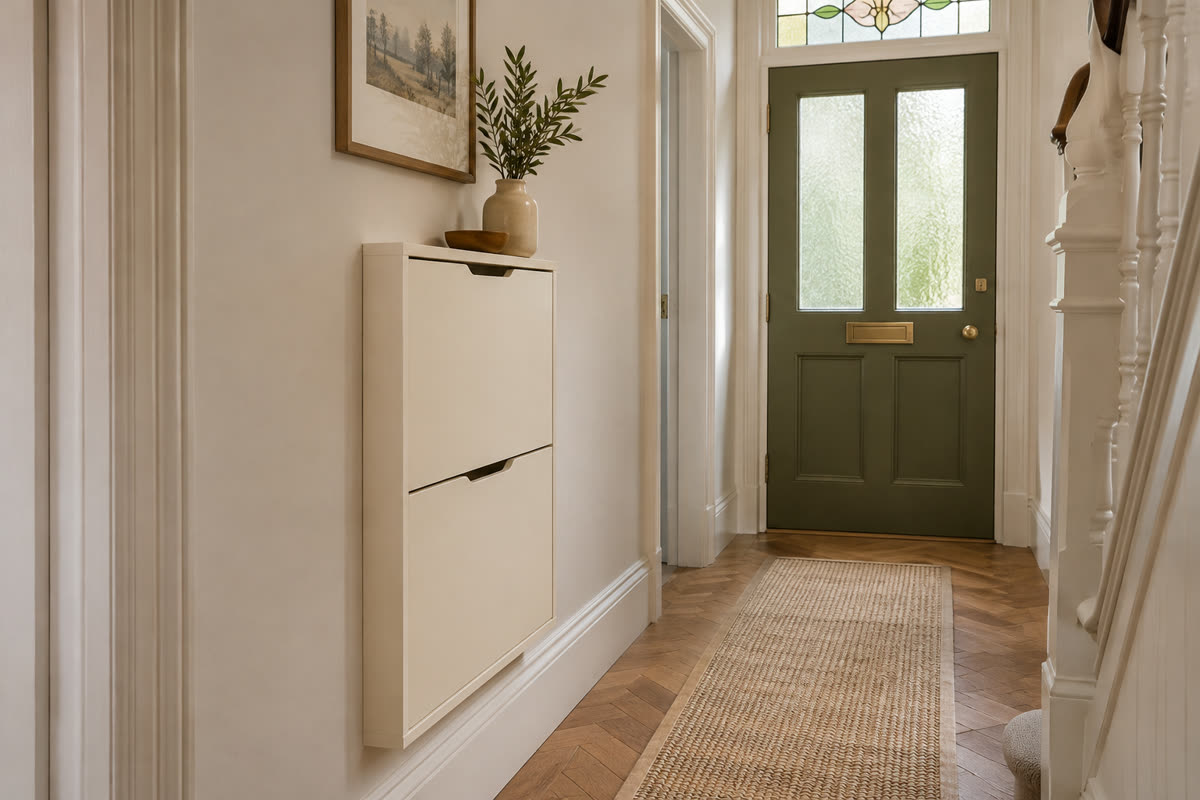
Four slim cabinets for different wall spaces
Compare the closed dimensions first. The space needed to open each flap and the usable space inside depend on the model and its installation.
Shallowest closed profile
IKEA TRONES white cabinets, pair
Two slim polypropylene cabinets. Place the modules beside each other or above one another as directed.
- Per cabinet · W × D × H cm
- 52 × 18 × 39
- Access
- Flip-open compartments
- In the pack
- Two cabinets
What to check Dimensions are per module. Fix each cabinet to the wall using suitable fixings for the wall material. Check the flap and shoe fit.
View on Amazon — IKEA TRONES white cabinets, pairNarrow wall space
SoBuy grey two-flap shoe cabinet
A 50 cm-wide cabinet with two tilting compartments and a 19 cm closed body.
- Outside · W × D × H cm
- 50 × 19 × 91
- Access
- Two flip drawers
- In the pack
- One cabinet
What to check Fit the supplied wall anti-tip device. Measure the fully open projection and the space inside the bin before choosing.
View on Amazon — SoBuy grey two-flap shoe cabinetAdjustable compartment layout
VASAGLE white two-flap shoe cabinet
Two flaps have adjustable, removable dividers so you can change how the available space is divided.
- Outside · W × D × H cm
- 60 × 24 × 83.5
- Access
- Two flip drawers
- In the pack
- One cabinet
What to check Use the supplied anti-tip fixing. Removing a divider changes the number of rows. Confirm the biggest shoe clears the full movement.
View on Amazon — VASAGLE white two-flap shoe cabinetLong wall with little depth
SoBuy wide white four-flap cabinet
Four tilting compartments across a 100 cm-wide, 19 cm-deep closed cabinet.
- Outside · W × D × H cm
- 100 × 19 × 91
- Access
- Four flip drawers
- In the pack
- One cabinet
What to check Check the entire wall span for obstructions. Fit the supplied anti-tip device and measure the space needed to use each flap.
View on Amazon — SoBuy wide white four-flap cabinetSide-by-side dimensions
Scroll sideways to see all columns.
| Cabinet | Width | Depth | Height | What to check |
|---|---|---|---|---|
| IKEA TRONES | 52 cm | 18 cm | 39 cm | Per module. Fix both to the wall. |
| SoBuy FSR151-HG | 50 cm | 19 cm | 91 cm | Check the two flaps against skirting and doorway. |
| VASAGLE LBC02WT | 60 cm | 24 cm | 83.5 cm | Check shoe fit in both divider positions. |
| SoBuy FSR177-L-W | 100 cm | 19 cm | 91 cm | Check that both sides can be opened and used. |
Measure the installed footprint
Pick the exact wall section before looking at advertised capacity. Start with the width between the nearest fixed obstacles. Measure at skirting height, at the top of the proposed cabinet and through the middle, where a frame or door handle can protrude. The smallest reading governs. A wall that looks 60 cm wide above the skirting can offer less room at floor level. Measure the distance to the opposite obstruction where the hall is narrowest, too.
Mark the closed outline with low-tack tape, then add any gap you need behind the cabinet. If the skirting stands 2 cm proud and the design has no suitable clearance, a 19 cm cabinet may use 21 cm of depth before a handle or trim projects. Check the assembly drawings to see how the back meets the wall. A gap you have allowed for on paper may need a different fixing arrangement, so resolve it before ordering.
Next, mark the door sweep and the zone occupied by the open cabinet. The outer corner of a tipping flap can pass through more space than you expect. Get the full opening measurement from the maker or seller. Leave space for someone to bend and remove shoes. Open the front door from both sides and repeat with the nearest interior door. A cabinet you have to shut every time someone passes is a poor place to keep shoes used on each school run.
Test the shoes, flap and divider together
Take the bulkiest pair you actually plan to store. Measure the sole from heel to toe along its longest point, the widest part of the sole and the tallest part of the upper. Include a heel pull tab if it projects. A broad trainer and a dress shoe with the same UK size can sit very differently in a tilted compartment.
Compare those three measurements with usable internal space. Hinge arms, stops and a sloping base can all reduce the room available. If the compartment takes shoes diagonally, measure the space the pair occupies in that orientation. Use our flip-down cabinet fit test to sketch a side view and check the path of the top of the shoe while the flap closes. Keep shoes you cannot verify on an open shelf and size the cabinet for the rest.
A divider creates two rows only when both rows have room for the shoes. On the VASAGLE cabinet, changing the divider can make one taller space more useful. Check whether that leaves enough room for the household's active pairs. Store the most-used shoes where the right person can reach them without tugging at a stuck flap.
Choose by wall span
For the shallowest body, start with IKEA TRONES. The two 52 cm-wide modules give you some freedom over where to put the second compartment. You can keep a low module accessible and use a higher one for occasional pairs, if the wall and fitting instructions allow the arrangement. Check each opening independently where the wall borders a doorway or stairs.
For a short continuous wall, the 50 cm-wide SoBuy brings both flaps into one unit. Mock up its 91 cm height as well as its 19 cm depth. A light switch can be usable above the body while the furniture still crowds the place you need to stand. The cabinet works best where the daily pair comes out towards an open patch of floor.
For a wider wall with some depth to spare, compare the 60 cm VASAGLE and the 100 cm SoBuy. The former uses 24 cm of closed depth and offers adjustable dividers. The latter uses 19 cm over a longer wall span and offers separate compartments on each side. Measure the left and right standing areas on the wide model. The far bank needs the same practical access as the near one.
Plan the fixing and daily routine
Check the exact instructions and your ability to use the prescribed wall fixings. Wall materials vary, especially where a hallway wall sits beside a staircase or has a shallow lining. Work out what the fixings can attach to and what sits behind the drilling point. Get competent help with installation if you are unsure. If you cannot use the specified fixings, see shoe storage without wall fixings for options that suit the space.
Decide where muddy or soaked footwear goes as part of the purchase. A small tray in a separate recess can take the pressure off the cabinet on wet evenings. Let shoes dry according to their care instructions before putting them away in a closed compartment. Work shoes and tall boots can have their own boot storage zone if they use the available cabinet space inefficiently.
Try the layout as a household before buying. Put out the number of pairs that arrive home together, hold the flap outline in place and see whether everyone can take their shoes off, reach a compartment and leave the hall clear. If the flap is the point of friction, compare a slim open rack with the same loaded footprint. For a full floor plan, use the hallway storage hub.
Questions before you choose
Which cabinet is shallowest in this shortlist?
IKEA TRONES is 18 cm deep with its flap closed. The usable bin and the projection when open are separate measurements.
Will an 18 cm cabinet take size 12 shoes?
The outside depth cannot tell you. Measure outsole length, heel height and forefoot width, then check them against the usable compartment and the flap movement.
Can I leave a slim shoe cabinet unsecured?
Use every wall fixing the exact model requires. Choose a different format if you cannot install it as directed.
Does the quoted depth include skirting?
The published figure describes the cabinet. Measure any gap your wall or skirting creates once the unit is installed.
Can I put two TRONES cabinets next to one another?
The modules can be arranged side by side as directed. Each needs suitable wall fixings and enough space for its flap.
What if the flap opens across the hall?
Mock up the open footprint and test a normal arrival. Move the cabinet to a recess or consider a rack if the opening blocks the route.
How this shortlist was assembled
We compared exact Amazon UK variants with manufacturer dimensions and fixing instructions. Depths in the table are closed outside measurements. Open projections and universal shoe capacities are omitted where we could not verify them.