
How to organise a drawer with rounded corners
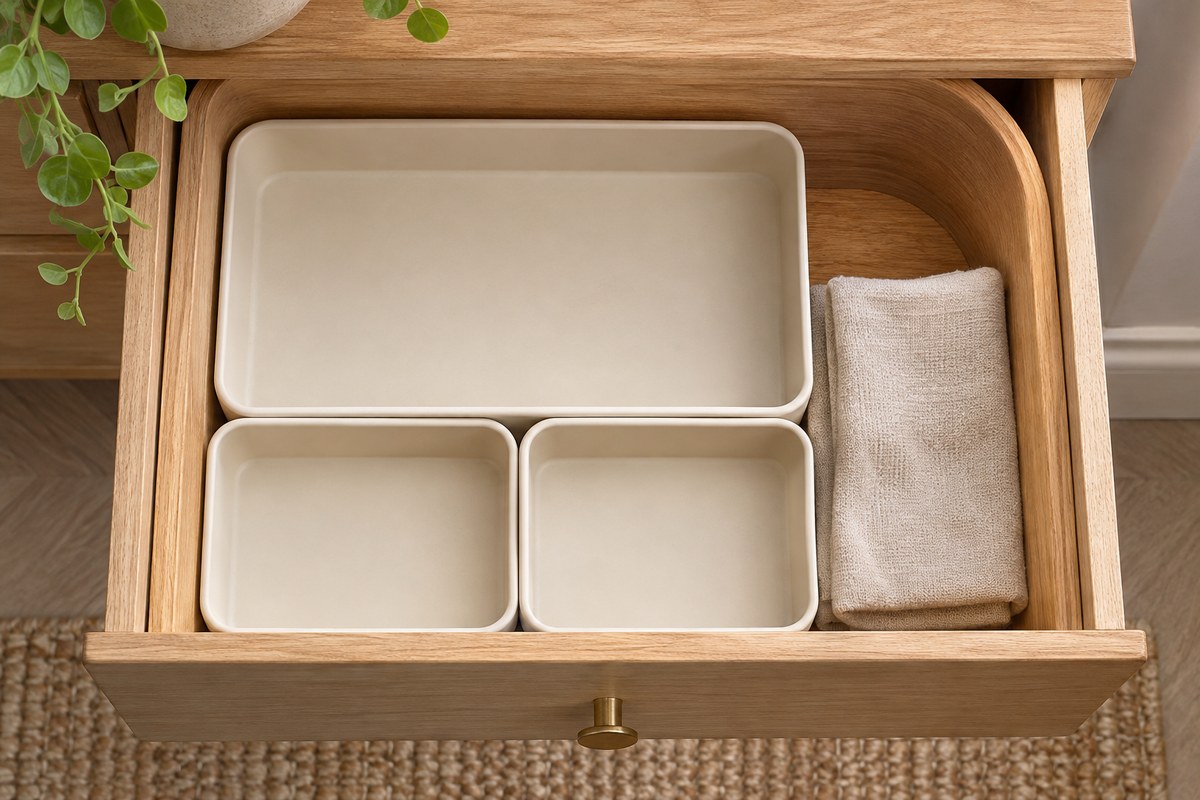
Trace the usable drawer base, fit rectangular trays inside the curved corners and leave practical gaps for grip and cleaning.
The main decision
Fit trays inside the flat usable outline
Trace the base and mark the curved corners before planning the tray grid. Use shorter or smaller pieces near the curve and keep enough space to lift each group out.
Trace the flat base where the trays will sit
Measure the inside of the drawer at the base, including its corners. The top opening may be wider than the flat surface below if the sides curve inward. Check the front, middle and back. Mark any fixing or raised seam that interrupts the base. Keep the paper template inside those obstructions and check that it lies flat with the drawer in its normal open position.
Use a sheet of paper or thin card to capture the corner shape. If the drawer is large, join several smaller sheets while they are flat inside it, then lift the outline out carefully. Mark the front so you can put it back in the same orientation. A single width and depth describe a rectangle. The curved edges of your template show which parts of that rectangle a tray can actually occupy.
Check how the curve changes with height. A low tray can sit closer to a rounded wall than a deeper one if the drawer widens above the base. Include any feet, liner or textured underside in the trial fit. Use the drawer measuring guide for the lowest closing clearance as well as the footprint.
Place small rectangles inside the outline
Start with the group that needs the longest compartment and draw its tray at full outside size. Put it in the most rectangular part of the template. Add the next largest group, then fit smaller compartments around it. Leave a gap where your hand needs to lift a tray or pick up the contents. A tray can fit the footprint and still be awkward if it is wedged tightly against the next piece.
A modular set can make it easier to change the arrangement. Check each tray’s outside dimensions and whether clips or connectors add to the whole layout. The footprint of one example arrangement may differ from the shape you need. The modular tray comparison explains how to plan with individual pieces and leave enough room for the resulting group.
The Joseph Joseph Blox set has seven trays that can clip together in different positions. Its listed 26.5 × 43.9 cm footprint describes one joined layout. Use the individual pieces to keep the back corners clear, then measure the resulting arrangement before putting it in the drawer. The empty trays are 5 cm high, so allow additional clearance for their contents.
For loose everyday essentials
Joseph Joseph Blox 7-piece organiser
Seven trays clip together in different arrangements, so you can group small accessories without committing to one large fixed insert.
- Example layout · cm
- 43.9 × 26.5 × 5
- Access
- Lift-out trays
- In the pack
- Seven trays
What to check The maker’s example arrangement is 43.9 × 26.5 × 5 cm. Check your chosen layout and the clearance under the drawer’s front rail.
View on Amazon — Joseph Joseph Blox 7-piece organiserGive awkward gaps a deliberate use
Keep the curve clear if it needs to remain accessible for cleaning or a tray grip. If there is a useful small space, choose something flexible that sits naturally within it, such as a folded cloth in a kitchen drawer. Check that it stays below the closing clearance. Loose small items can slip beneath the tray edge and make the layout harder to maintain.
A divider needs its end fittings to sit on a suitable surface. Check the maker’s guidance before placing a spring-loaded end on a curved wall. If the contact is narrow or unstable, use a different orientation on a compatible flat side or choose separate trays. The divider guide compares fitting ranges and end supports.
Keep the heaviest or tallest small group in a position where it cannot push a neighbouring tray out of place during normal use. A small liner can change the grip and height, so include it in the layout if you plan to use one. For fabric bins, measure the filled base and corners. Their flexibility can help with an irregular outline, but overfilling can push the rim towards the rail.
Try the complete arrangement before filling every tray
Place the empty trays into the drawer in the order shown on your template. Check that every base sits flat. Take each tray out and return it without lifting the one next to it. Add the tallest and widest items first, then close the drawer gently. Look for a tray corner lifting, a soft bin bulging or a handle moving into the closing path.
Try the layout after you remove a regular item and put it back. If a small piece repeatedly falls into the curved gap, change the compartment position or give that item a different home. Save the template if you expect the contents to change. Use the general layout guide to update the arrangement when you add a new group.
Questions before you choose
Why does a tray fit at the front but catch at the back?
The curved rear corners can narrow the usable base. Measure or trace the full footprint at the height where the tray sits.
Should I fill every corner gap?
Leave gaps that help with grip, removal or cleaning. Use a small soft item only if it stays clear of moving fittings and the closing path.
Can a rectangular tray sit on the curve?
Its full base should rest as the maker intends. Use a smaller footprint if the edge rocks or rides up the drawer wall.
Do I measure above a drawer liner?
Include its fitted thickness and any bunching at the curve. Recheck the tray position and loaded closing height.
Will modular trays solve every curved drawer?
Try the exact piece footprints, clips and loaded height. Separate small pieces offer options, but the complete arrangement still has to fit.
How we put this guide together
We reviewed the selected modular tray dimensions and used a paper-template method to distinguish the opening from the supported base. The corner measurements are illustrative and need checking on your own drawer.